{{ asset('logo.png') }}
{# in a regular page: http://static1.domain.com/images/logo.png #}{# in a secure page: https://static2.domain.com/images/logo.png #}
BinaryFileResponse supports X-Sendfile (Nginx and Apache). To use of it,
you need to determine whether or not the X-Sendfile-Type header should be
trusted and call trustXSendfileTypeHeader() if it should:
useSymfony\Component\HttpFoundation\Session\Session;
$session = newSession();
$session->start();
$session->getFlashBag()->add(
'warning',
'Your config file is writable, it should be set read-only'
);
$session->getFlashBag()->add('error', 'Failed to update name');
$session->getFlashBag()->add('error', 'Invalid email');
Avoiding XSSI JSON Hijacking (only GET requests are vulnerable)
Pass an associative array as the outer-most array to JsonResponse
and not an indexed array so that the final result is an object: {"object": "not inside an array"}
instead of an array: [{"object": "inside an array"}]
PIAF – Portal de Inscrições de Atividades Físicas da COESPE/UFRN
Bem-vindo ao repositório oficial da PIAF, o Portal de Inscrições de Atividades Físicas da UFRN. Este projeto foi desenvolvido para facilitar a inscrição em atividades físicas oferecidas pela COESPE na UFRN, proporcionando uma experiência simples e eficiente tanto para os usuários quanto para os administradores (bolsistas).
📖 Sobre o Projeto
O PIAF é uma plataforma que permite aos usuários:
Visualizar as modalidades de atividades físicas disponíveis.
Realizar inscrições de forma rápida e prática.
Acompanhar suas turmas e resultados.
Entrar em listas de espera.
Renovar matrículas.
Não enfrentar filas grandes.
Além disso, os administradores têm acesso a ferramentas para gerenciar as atividades, como:
Criar novas turmas.
Gerenciar inscrições.
Visualizar relatórios de participação.
Efetuar chamadas de presença.
Remover alunos inativos.
Enviar chamados via e-mail para os candidatos e alunos.
Ver estatísticas do sistema.
O objetivo principal do PIAF é reduzir a burocracia e otimizar o processo de inscrição, beneficiando tanto os participantes quanto os bolsistas responsáveis pelas atividades. Como consquência, este sistema impacta no meio ambiente, já que as pessoas não terão necessidade de se locomover com seus devidos veículos até a instituição (mesmo sem ter garantia da vaga) e também a redução do consumo de papel e tinta de impressora.
Impacto no meio ambiente
Aproveitando o gancho da questão ambiental, temos alguns dados aproximados no impacto que será reduzido nos dias das inscrições. Vamos levar em consideração que foram aproximadamente 1000 pessoas realizar as inscrições (se todas que se inscreveram, estiverem presentes), por incrível mil é um número arredondado para baixo do valor real.
Para calcular a emissão de carbono, precisamos considerar alguns fatores:
Automóveis: A emissão média de dióxido de carbono (CO₂) por quilômetro varia dependendo do tipo de combustível e eficiência do veículo. Para carros a gasolina, estima-se cerca de 120 gramas de CO₂ por quilômetro. Com 1000 pessoas percorrendo aproximadamente 40 km (soma da ida e volta), a emissão total seria aproximadamente 4,800 kg de CO₂ !
Ônibus: Ônibus geralmente emitem menos CO₂ por passageiro, mas como você serão 2 ônibus (ida e volta) e também o círcular para ir e outro para voltar, a emissão total dependerá do tipo de combustível e eficiência. Um ônibus a diesel pode emitir cerca de 1,300 gramas de CO₂ por quilômetro. Para 4 ônibus percorrendo 40 km, a emissão total seria aproximadamente 208 kg de CO₂.
Mesmo que todos estivessem de ônibus, ainda teríamos uma quantidade significativa de dióxido de carbono na atmosfera, então, zero é um número bem melhor! Já que ninguém precisará se locomover (exceto idosos que não souberem usar o sistema, mas mesmo assim é um número muito menor).
🚀 Funcionalidades
Para Usuários
Cadastro e Login:
Criação de conta com informações básicas.
Login seguro com autenticação.
Inscrição em Atividades:
Visualização de todas as modalidades disponíveis.
Inscrição rápida com apenas um clique.
Minhas Turmas:
Acompanhamento das turmas em que o usuário está inscrito.
Informações detalhadas sobre horários, vagas e status.
Resultados:
Acesso aos resultados das atividades realizadas.
Para Administradores
Painel de Controle:
Acesso a um dashboard com informações gerais sobre as atividades.
Gerenciamento de Turmas:
Criação, edição e exclusão de turmas.
Controle de vagas e participantes.
Relatórios:
Visualização de relatórios detalhados sobre inscrições e participação.
🛠️ Tecnologias Utilizadas
Ruby on Rails: Framework principal para o desenvolvimento do backend.
PostgreSQL: Banco de dados utilizado para armazenar informações de usuários, turmas e inscrições.
Bootstrap: Framework CSS para estilização e responsividade. Quase que metade do frontend é baseado em Bootstrap.
JavaScript: Para funcionalidades dinâmicas do carrousel e do FAQ.
📂 Estrutura do Projeto
Diretórios Principais
app/: Contém os arquivos principais da aplicação, como controllers, models e views.
app/views/pages/: Contém as páginas principais, como a página inicial e FAQ.
app/views/shared/: Contém componentes reutilizáveis, como a barra lateral e cabeçalho.
config/: Configurações da aplicação, incluindo rotas.
db/: Arquivos relacionados ao banco de dados, como migrações e seeds.
⚙️ Configuração do Ambiente
Pré-requisitos para funcionar
Ruby: 3.2 ou superior.
Rails: 8.0.1.
PostgreSQL: Instalado e configurado.
Passos para Configuração inicial
Clone o repositório e acesse a pasta:
git clone https://github.com/otsuki-dev/piaf-ufrn
cd piaf-ufrn
Instale as dependências:
bundle install
yarn install
Configure o banco de dados:
rails db:create db:migrate db:seed
Inicie o servidor:
rails server
Acesse a aplicação no navegador:
http://localhost:3000
🖼️ Estrutura de Interface
Página Inicial (home)
Apresenta informações sobre o portal e as modalidades disponíveis.
FAQ (Perguntas frequentes)
Responde às perguntas mais frequentes sobre o funcionamento do portal.
Painel do Usuário (página com login)
Permite que o usuário visualize suas turmas e resultados.
Painel do Administrador (página dos bolsistas)
Oferece ferramentas para gerenciar turmas e visualizar relatórios.
📋 Contribuição
Contribuições são muito bem-vindas! Siga os passos abaixo para contribuir:
Faça um fork do repositório.
Crie uma branch para sua feature:
git checkout -b minha-feature
Faça as alterações e commit:
git commit -m "Exemplo de commit de um contibuidor B)"
Envie um pull request.
🛡️ Licença
Este projeto está licenciado sob a MIT License. Vocẽ pode contribuir e modificar ao seu critério, porém não se esqueça dos crétitos de licença, deu muito trabalho! 😉
📞 Contato
Para dúvidas ou sugestões, entre em contato com o @felipe-sbm:
Each record represents a ticket in Hubspot, enriched with metrics about engagement activities and information on associated deals, contacts, companies, and owners.
Each record represents an engagement event in Hubspot, joined with relevant tables to make them analysis-ready.
Materialized Models
Each Quickstart transformation job run materializes 147 models if all components of this data model are enabled. This count includes all staging, intermediate, and final models materialized as view, table, or incremental.
How do I use the dbt package?
Step 1: Prerequisites
To use this dbt package, you must have the following:
At least one Fivetran HubSpot connection syncing data into your destination.
A BigQuery, Snowflake, Redshift, PostgreSQL, or Databricks destination.
Databricks Dispatch Configuration
If you are using a Databricks destination with this package you will need to add the below (or a variation of the below) dispatch configuration within your dbt_project.yml. This is required in order for the package to accurately search for macros within the dbt-labs/spark_utils then the dbt-labs/dbt_utils packages respectively.
Many of the models in this package are materialized incrementally, so we have configured our models to work with the different strategies available to each supported warehouse.
For BigQuery and Databricks All Purpose Cluster runtime destinations, we have chosen insert_overwrite as the default strategy, which benefits from the partitioning capability.
For Databricks SQL Warehouse destinations, models are materialized as tables without support for incremental runs.
For Snowflake, Redshift, and Postgres databases, we have chosen delete+insert as the default strategy.
Regardless of strategy, we recommend that users periodically run a --full-refresh to ensure a high level of data quality.
Step 2: Install the package
Include the following hubspot package version in your packages.yml file:
TIP: Check dbt Hub for the latest installation instructions or read the dbt docs for more information on installing packages.
packages:
- package: fivetran/hubspotversion: [">=1.0.0", "<1.1.0"] # we recommend using ranges to capture non-breaking changes automatically
All required sources and staging models are now bundled into this transformation package. Do not include fivetran/hubspot_source in your packages.yml since this package has been deprecated.
Databricks dispatch configuration
If you are using a Databricks destination with this package, you must add the following (or a variation of the following) dispatch configuration within your dbt_project.yml. This is required in order for the package to accurately search for macros within the dbt-labs/spark_utils then the dbt-labs/dbt_utils packages respectively.
By default, this package runs using your destination and the hubspot schema. If this is not where your hubspot data is (for example, if your hubspot schema is named hubspot_fivetran), add the following configuration to your root dbt_project.yml file:
When setting up your Hubspot connection in Fivetran, it is possible that not every table this package expects will be synced. This can occur because you either don’t use that functionality in Hubspot or have actively decided to not sync some tables. Therefore we have added enable/disable configs in the src.yml to allow you to disable certain sources not present. Downstream models are automatically disabled as well. In order to disable the relevant functionality in the package, you will need to add the relevant variables in your root dbt_project.yml. By default, all variables are assumed to be true, with the exception of:
hubspot_service_enabled
hubspot_ticket_deal_enabled
hubspot_contact_merge_audit_enabled
hubspot_merged_deal_enabled
hubspot_engagement_communication_enabled
These default to false and must be explicitly enabled if needed. You only need to add variables for the sources that differ from their defaults.
vars:
# Marketinghubspot_marketing_enabled: false # Disables all marketing modelshubspot_contact_enabled: false # Disables the contact modelshubspot_contact_form_enabled: false # Disables form and contact form submission data and its relationship to contactshubspot_contact_list_enabled: false # Disables contact list modelshubspot_contact_list_member_enabled: false # Disables contact list member modelshubspot_contact_merge_audit_enabled: true # Enables the use of the CONTACT_MERGE_AUDIT table (deprecated by Hubspot v3 API) for removing merged contacts in the final models.# If false, contacts will still be merged using the CONTACT.property_hs_calculated_merged_vids field.# Default = falsehubspot_contact_property_enabled: false # Disables the contact property modelshubspot_contact_property_history_enabled: false # Disables the contact property history modelshubspot_email_event_enabled: false # Disables all email_event models and functionalityhubspot_email_event_bounce_enabled: falsehubspot_email_event_click_enabled: falsehubspot_email_event_deferred_enabled: falsehubspot_email_event_delivered_enabled: falsehubspot_email_event_dropped_enabled: falsehubspot_email_event_forward_enabled: falsehubspot_email_event_click_enabled: falsehubspot_email_event_open_enabled: falsehubspot_email_event_print_enabled: falsehubspot_email_event_sent_enabled: falsehubspot_email_event_spam_report_enabled: falsehubspot_email_event_status_change_enabled: false# Saleshubspot_sales_enabled: false # Disables all sales modelshubspot_company_enabled: falsehubspot_company_property_history_enabled: false # Disables the company property history modelshubspot_deal_enabled: falsehubspot_deal_company_enabled: falsehubspot_deal_contact_enabled: falsehubspot_deal_property_history_enabled: false # Disables the deal property history modelshubspot_engagement_enabled: false # Disables all engagement models and functionalityhubspot_engagement_call_enabled: falsehubspot_engagement_company_enabled: falsehubspot_engagement_communication_enabled: true # Enables the link between communications and engagementshubspot_engagement_contact_enabled: falsehubspot_engagement_deal_enabled: falsehubspot_engagement_email_enabled: falsehubspot_engagement_meeting_enabled: falsehubspot_engagement_note_enabled: falsehubspot_engagement_task_enabled: falsehubspot_merged_deal_enabled: true # Enables the merged_deal table to filter merged deals from final models. Default = falsehubspot_owner_enabled: falsehubspot_property_enabled: false # Disables property and property_option tableshubspot_role_enabled: false # Disables role metadatahubspot_team_enabled: false # Disables team metadatahubspot_team_user_enabled: false # Disables user-to-team relationships# Servicehubspot_service_enabled: true # Enables all service modelshubspot_ticket_deal_enabled: true
(Optional) Step 5: Additional configurations
Configure email metrics
This package allows you to specify which email metrics (total count and total unique count) you would like to be calculated for specified fields within the hubspot__email_campaigns model. By default, the email_metrics variable below includes all the shown fields. If you would like to remove any field metrics from the final model, you may copy and paste the below snippet within your root dbt_project.yml and remove any fields you want to be ignored in the final model.
vars:
email_metrics: ['bounces', #Remove if you do not want metrics in final model.'clicks', #Remove if you do not want metrics in final model.'deferrals', #Remove if you do not want metrics in final model.'deliveries', #Remove if you do not want metrics in final model.'drops', #Remove if you do not want metrics in final model.'forwards', #Remove if you do not want metrics in final model.'opens', #Remove if you do not want metrics in final model.'prints', #Remove if you do not want metrics in final model.'spam_reports', #Remove if you do not want metrics in final model.'unsubscribes'#Remove if you do not want metrics in final model.]
Include passthrough columns
This package includes all source columns defined in the macros folder. We highly recommend including custom fields in this package as models now only bring in a few fields for the company, contact, deal, and ticket tables. You can add more columns using our pass-through column variables. These variables allow for the pass-through fields to be aliased (alias) and casted (transform_sql) if desired, but not required. Datatype casting is configured via a sql snippet within the transform_sql key. You may add the desired sql while omitting the as field_name at the end and your custom pass-though fields will be casted accordingly. Use the below format for declaring the respective pass-through variables in your root dbt_project.yml.
Alternatively, if you would like to simply pass through all columns in the above four tables, add the following configuration to your dbt_project.yml. Note that this will override any hubspot__[table_name]_pass_through_columns variables.
vars:
  hubspot__pass_through_all_columns: true # default is false
Adding property label
For property_hs_* columns, you can enable the corresponding, human-readable property_option.label to be included in the staging models.
Important
You must have sources property and property_option enabled to enable labels. By default, these sources are enabled.
You CANNOT enable labels if using hubspot__pass_through_all_columns: true.
We recommend being selective with the label columns you add. As you add more label columns, your run time will increase due to the underlying logic requirements.
To enable labels for a given property, set the property attribute add_property_label: true, using the below format.
Alternatively, you can enable labels for all passthrough properties by using variable hubspot__enable_all_property_labels: true, formatted like the below example.
This package also provides the ability to pass calculated fields through to the company, contact, deal, and ticket staging models. If you would like to add a calculated field to any of the mentioned staging models, you may configure the respective hubspot__[table_name]_calculated_fields variables with the name of the field you would like to create, and the transform_sql which will be the actual calculation that will make up the calculated field.
When leveraging email events, HubSpot customers may take advantage of filtering out specified email events. These filtered email events are present within the stg_hubspot__email_events model and are identified by the is_filtered_event boolean field. By default, these events are included in the staging and downstream models generated from this package. However, if you wish to remove these filtered events you may do so by setting the hubspot_using_all_email_events variable to false. See below for exact configurations you may provide in your dbt_project.yml file:
vars:
  hubspot_using_all_email_events: false # True by default
Daily ticket history
The hubspot__daily_ticket_history model is disabled by default, but will materialize if hubspot_service_enabled is set to true. See additional configurations for this model below.
Note: hubspot__daily_ticket_history and its parent intermediate models are incremental. After making any of the below configurations, you will need to run a full refresh.
Tracking ticket properties
By default, hubspot__daily_ticket_history will track each ticket’s state, pipeline, and pipeline stage and pivot these properties into columns. However, any property from the source TICKET_PROPERTY_HISTORY table can be tracked and pivoted out into columns. To add other properties to this end model, add the following configuration to your dbt_project.yml file:
vars:
  hubspot__ticket_property_history_columns:
    - the
    - list
    - of
    - property
    - names
Extending ticket history past closing date
This package will create a row in hubspot__daily_ticket_history for each day that a ticket is open, starting at its creation date. A Hubspot ticket can be altered after being closed, so its properties can change after this date.
By default, the package will track a ticket up to its closing date (or the current date if still open). To capture post-closure changes, you may want to extend a ticket’s history past the close date. To do so, add the following configuration to your root dbt_project.yml file:
By default this package will build the HubSpot staging models within a schema titled (<target_schema> + _stg_hubspot) and HubSpot final models within a schema titled (<target_schema> + hubspot) in your target database. If this is not where you would like your modeled HubSpot data to be written to, add the following configuration to your root dbt_project.yml file:
models:
hubspot:
+schema: my_new_schema_name # Leave +schema: blank to use the default target_schema.staging:
+schema: my_new_schema_name # Leave +schema: blank to use the default target_schema.
Change the source table references
If an individual source table has a different name than the package expects, add the table name as it appears in your destination to the respective variable:
IMPORTANT: See this project’s dbt_project.yml variable declarations to see the expected names.
This dbt package is dependent on the following dbt packages. These dependencies are installed by default within this package. For more information on the following packages, refer to the dbt hub site.
IMPORTANT: If you have any of these dependent packages in your own packages.yml file, we highly recommend that you remove them from your root packages.yml to avoid package version conflicts.
How is this package maintained and can I contribute?
Package Maintenance
The Fivetran team maintaining this package only maintains the latest version of the package. We highly recommend you stay consistent with the latest version of the package and refer to the CHANGELOG and release notes for more information on changes across versions.
Contributions
A small team of analytics engineers at Fivetran develops these dbt packages. However, the packages are made better by community contributions.
We highly encourage and welcome contributions to this package. Check out this dbt Discourse article on the best workflow for contributing to a package.
Are there any resources available?
If you have questions or want to reach out for help, see the GitHub Issue section to find the right avenue of support for you.
If you would like to provide feedback to the dbt package team at Fivetran or would like to request a new dbt package, fill out our Feedback Form.
This project consist of a collection of scripts that explore capabilities provided by neural networks (NN), generative pre-trained transformers (GPT) and large language models (LLM). Most of these scripts are based on models hosted by Hugging Face (https://huggingface.co/).
Note that during the fist run, the library will download the required model to process the inputs.
Sentiment Analysis
The sentiment.py script prompts the user for a line of text and uses a model to determine the sentiment of the text (positive, neutral or negative).
Enter some text (or empty to end): I love you.
Sentiment score: [{'label': 'positive', 'score': 0.9286843538284302}]

Enter some text (or empty to end): I am sad.
Sentiment score: [{'label': 'negative', 'score': 0.7978498935699463}]

Enter some text (or empty to end): I hate dirty pots.
Sentiment score: [{'label': 'negative', 'score': 0.9309694170951843}]

Enter some text (or empty to end): Don't move!
Sentiment score: [{'label': 'neutral', 'score': 0.6040788292884827}]
Summarization
The summary.py script takes a text file input and uses the summarization model to produce a single paragraph summary.
$ python3 summary.py pottery.txt
Loading transformer...

Reading pottery.txt...
Number of lines: 14
Number of words: 566
Number of characters: 3416

Summarizing...
Text:  The key to becoming a great artist, writer, musician, etc., is to keep creating!
Keep drawing, keep writing, keep playing! Quality emerges from the quantity of practice
and continuous learning that makes them more perfect . The prize of perfection comes by
delivering and learning, says Jason Cox .
Number of lines: 1
Number of words: 49
Number of characters: 299
Transcribe
The transcribe.py script takes an audio file (mp3 or wav file) and uses a speech model to produce a basic text transcription. A additional tool record.py will use your laptops microphone to record your dictation into audio.wav that can be used by transcribe.py.
$ python3 speech.py

Loading models...

Converting text to speech...

Writing to audio.wav...

Speaking: Perfection is achieved, not when there is nothing more to add, but when there is nothing left to take away.
output.mp4
Speech to Text
The advanced OpenAI Whisper model can be used to do transcription. Sample scripts are located in the whisper folder.
There are several models and kits emerging that allow you to build your own speech model based on sample speech. The TTS python package is one, by coqui-ai https://github.com/coqui-ai/TTS
# Install TTS
pip install TTS
Example (TBD)
fromTTS.apiimportTTStts=TTS("tts_models/multilingual/multi-dataset/xtts_v2", gpu=True)
# generate speech by cloning a voice using default settingstts.tts_to_file(text="It took me quite a long time to develop a voice, and now that I have it I'm not going to be silent.",
file_path="output.wav",
speaker_wav="/path/to/target/speaker.wav",
language="en")
Handwriting to Text
The handwriting.py script converts an image of a handwritten single line of text to a string of text.
# Requirements
pip install image
$ python3 handwriting.py test.png
Converting image to text: test.png

Loading transformer...
 * microsoft/trocr-base-handwritten

Analyzing handwriting from test.png...

Resulting text:
This is a test-Can you read this?
Large Language Models (LLM)
The exploration of different LLMs is located in the llm folder. The goal of this section is to explore the different LLM models, specifically related to building, training, tuning and using these models.
BiGram – This experiment uses an introductory training model based on the “Let’s build a GPT from scratch” video by Andrej Karpathy.
nanoGPT – Similar to above but using the tiny GPT, Andrej Karpathy’s nanoGPT
LLaMA – The llama.cpp project’s goal is to run LLaMA models using integer quantization to allow the use of these LLMs on local small scale computers like a MacBook.
OpenAI Test
The openai.py script prompts the OpenAI gpt-3.5 model and prints the response.
# Requirements
pip install openai

# Test
$ python3 gpt.py
What do you want to ask? Can you say something to inspire engineers?

Answer: {
  "choices": [
    {
      "finish_reason": "stop",
      "index": 0,
      "message": {
        "content": "Of course! Here's a quote to inspire engineers:\n\n\"Engineering is not only about creating solutions, it's about creating a better world. Every time you solve a problem, you make the world a little bit better.\" - Unknown\n\nAs an engineer, you have the power to make a positive impact on society through your work. Whether you're designing new technologies, improving existing systems, or solving complex problems, your contributions are essential to advancing our world. So keep pushing the boundaries of what's possible, and never forget the impact that your work can have on the world around you.",
        "role": "assistant"
      }
    }
  ],
  "created": 1685856679,
  "id": "chatcmpl-7Nach0z2sJQ5FzZOVl6jZWPU4O6zV",
  "model": "gpt-3.5-turbo-0301",
  "object": "chat.completion",
  "usage": {
    "completion_tokens": 117,
    "prompt_tokens": 26,
    "total_tokens": 143
  }
}
GPT-2 Text Generation
The gpt-2.py script uses the gpt2-xl model to generate test based on a prompt.
$ python3 gpt-2.py
[{'generated_text': "Hello, I'm a language model, but what I do you need to know isn't that hard. But if you want to understand us, you"}, {'generated_text': "Hello, I'm a language model, this is my first commit and I'd like to get some feedback to see if I understand this commit.\n"}, {'generated_text': "Hello, I'm a language model, and I'll guide you on your journey!\n\nLet's get to it.\n\nBefore we start"}, {'generated_text': 'Hello, I\'m a language model, not a developer." If everything you\'re learning about code is through books, you\'ll never get to know about'}, {'generated_text': 'Hello, I\'m a language model, please tell me what you think!" – I started out on this track, and now I am doing a lot'}]
Earth Beauty ia a term used for natural beauty which is in its original or inherent form.
The natural beauty need not be achieved by doing or wearing something.
In this website you can find ways to enrich your skin by natural Earth.
Project overview
This website is created to change the perspective of young people where natural beauty is born naturally and everyone is beautiful.
Beauty is a relative word. It changes with the country,race,caste,color and creed.
Our initiative is to create awarness amoung people to admire themselves.This program is unique in itself where we change the meaning of beauty which is not just by make-up,plastic surgery.
we provide different natural techniques so that our customers can develop a healthy lifestyle.
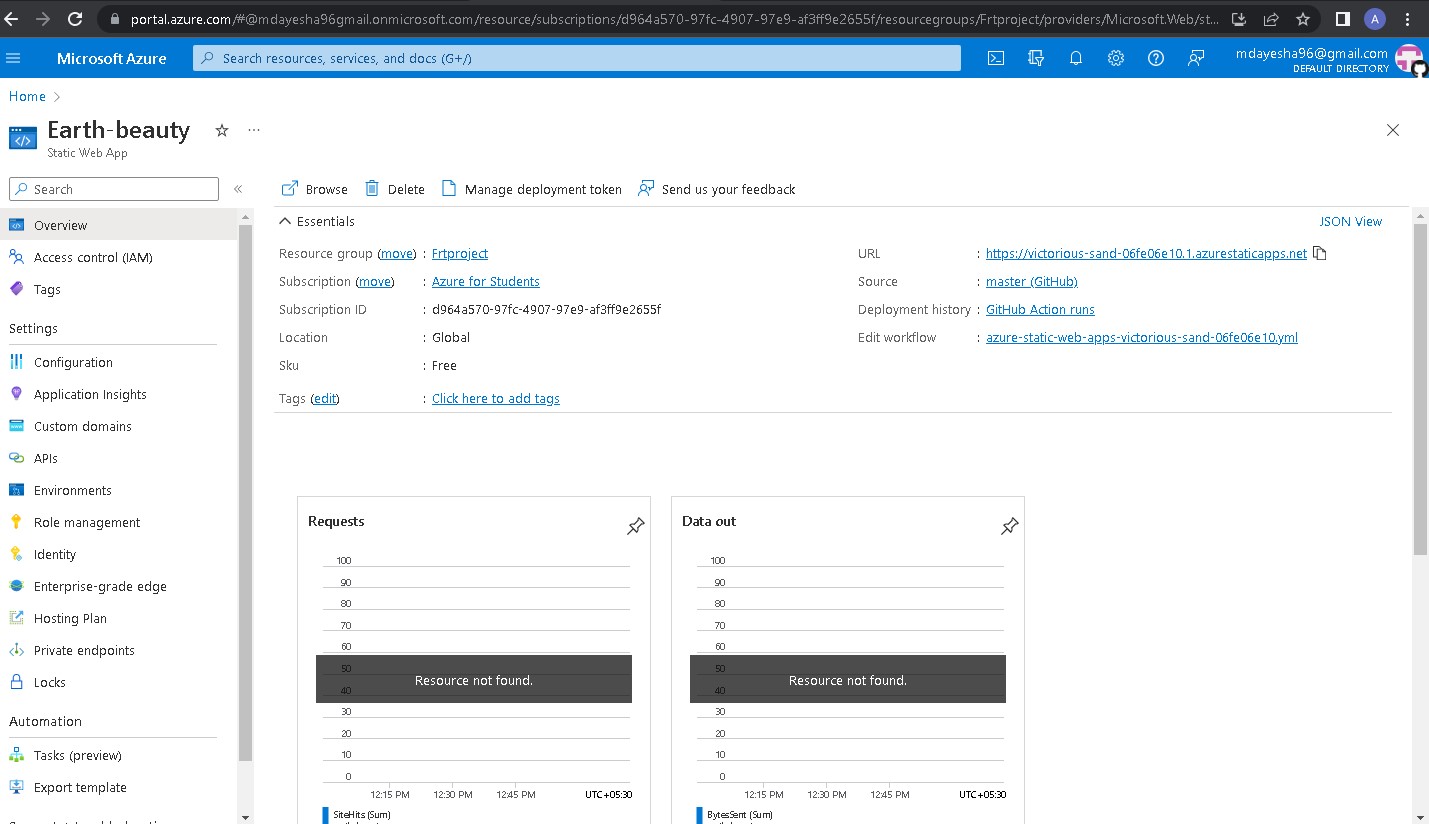
Azure Technology Used:
Static Web App
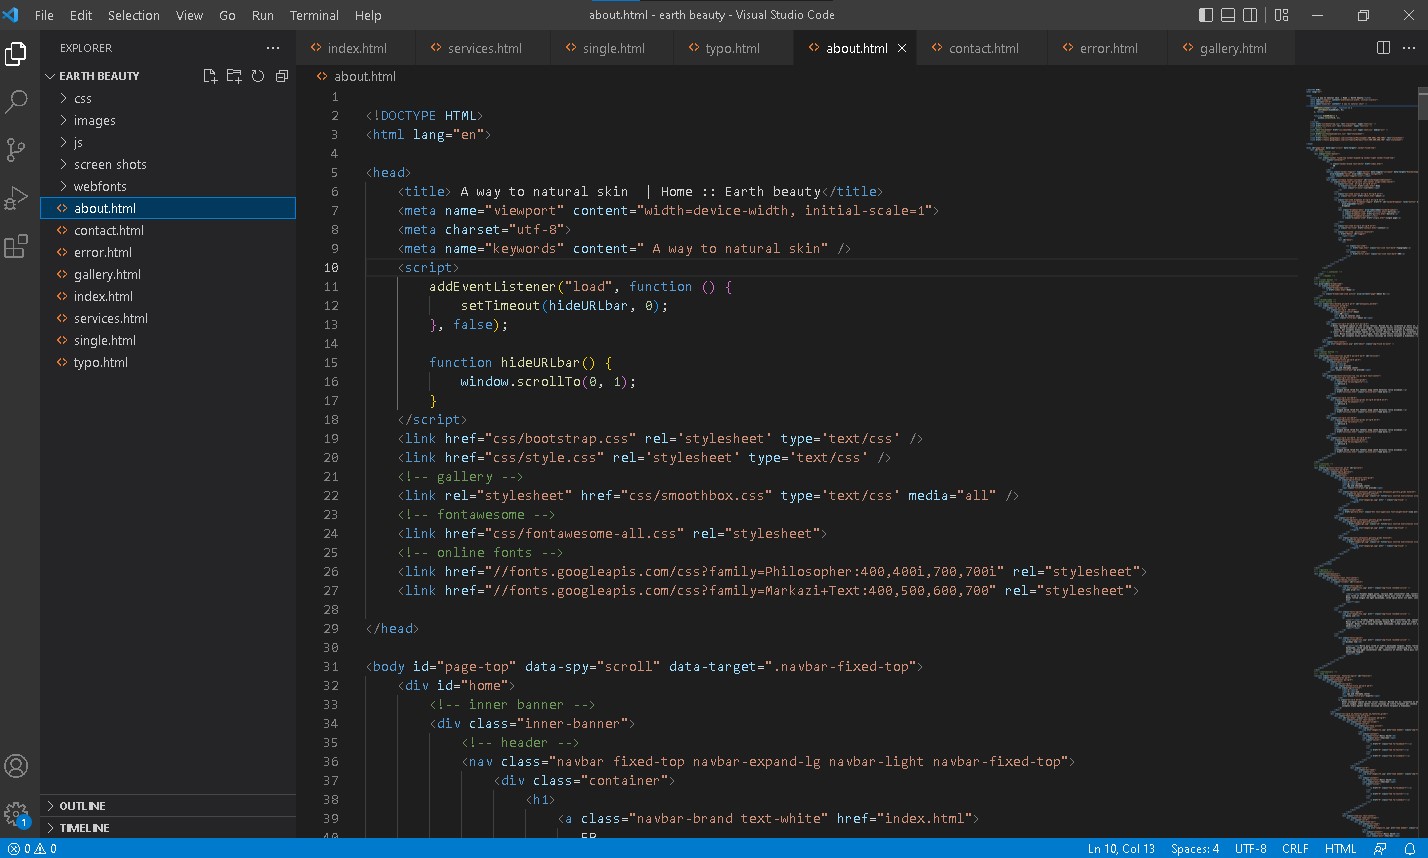
Visual Studio Code
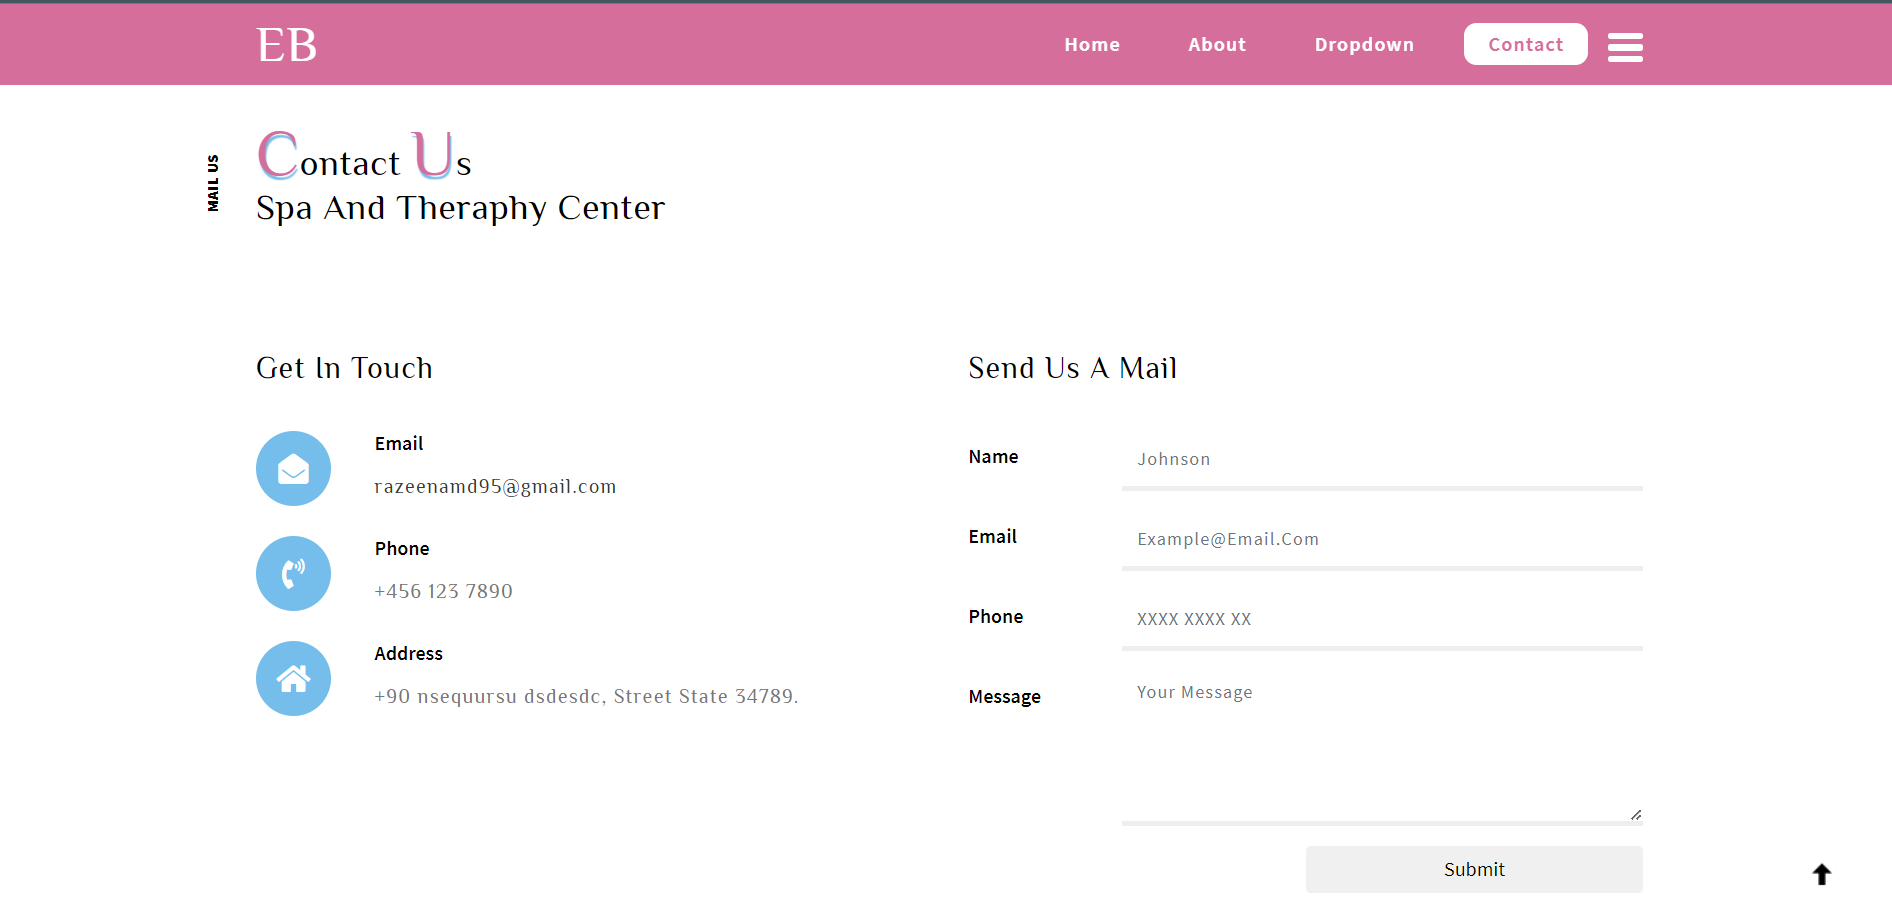
Our website include :
home
gallery
about us
services
our blog
our branches
contact
Dont think much and join our program and build a healthy life and gain natural beauty.
present: Which type of directive to parse. Values: inline, block, both.
name: The name of the directive
tag: The tag name of the converted component
allowedAttrs: Allowed attribute names. If set as an array, elements in the array can be a String or a RegEx. If not set, allow any name. (has security issues, not recommended)
destLinkName: Attribute name when converting link-type data in link destinations (ie. the content in ()) to attributes. src by default
destStringName: Attribute name when converting string-type data in link destinations to attributes. title by default
parseInner: Whether to continue to parse the content as Markdown or not. Bool type. if it is false, the content will be unescaped and written in the output (html < > etc. will still be escaped).
Here are three directive formats that can be recognized:
text before :directive-name[content](/link "destination" /another "one"){.class #id name=value name="string!"} text after

:: directive-name [inline content] (/link "destination" /another "one") {.class #id name=value name="string!"} content title ::

::: directive-name [inline content] (/link "destination" /another "one") {.class #id name=value name="string!"} content title ::
content
:::
Will be converted to:
<p>text before <tag-nameclass="class" id="id" name="value" src="/link" title="destination" inline="">content</tag-name> text after</p><tag-nameclass="class" id="id" name="value" src="/link" title="destination">inline content</tag-name><tag-nameclass="class" id="id" name="value" src="/link" title="destination"><p>content</p></tag-name>
In the conversion process, link-type value which in () will add to src attribute, and string-type value will add to title attribute. class‘s values will be merged together and other attributes will pick the first value.
Block-level directive, if it is the third case, it will ignore the inline content and content title, and parse the content as block; if the second case, if there is, then use inline content otherwise use content title as content and parse the content as inline.
They are grouped into requests with team, event, district, or match parameters, and you will need to use the teamRequest, eventRequest, or matchRequest instance variables found in the TBA class.
Here is an example of retrieving an array of teams in the FIRST Mid-Atlantic district in 2017:
The JSON data will need to be deserialized into an object model with a method in the Deserializer class before being used.
Here is an example of fetching the Match objects for the 2017 Mount Olive District Event, if they have been updated.
APIResponse resp = tba.dataRequest.getDataTBA("/event/2017njfla/matches");
String lastModified = resp.getLastModified();
Match[] matchList = Deserializer.toMatchArray(resp.getJson());

// Execute the following code block after waiting or in a separate method

resp = tba.dataRequest.getDataTBA("/event/2017njfla/matches", lastModified);

if(resp.getResponseCode()!=304){ // HTTP code 304 indicates no change
	teamList = Deserializer.jsonToTeamArray(resp.getJson());
	lastModified = resp.getLastModified();
	}
}
Models
A list of object model classes and their getter methods for instance variables can be found here. Please note that the master branch of this repository contains updated object models for the current season’s code, and object models for past seasons can be found in other branches.
Dependencies
You will need Gson to use the released compiled TBA API JAR file in your project. Gson can be installed with Maven, via a JAR file, or with Gradle if you include the following in your build.gradle


 https://github.com/Gemini67/Celma